This light meter manual library is for reference
and historical purposes, all rights reserved.
This page is copyright© by ,
M. Butkus, NJ.
This page may not be sold or distributed without
the expressed permission of the producer
I have no connection with any camera company
On-line camera manual library
If you find this manual useful,
how about a donation of
$3 to:
M. Butkus, 29 Lake Ave.,
High Bridge, NJ 08829-1701
and send your e-mail
address
so I can thank you.
Most other places would charge
you $7.50 for
a electronic copy
or $18.00 for a hard to read Xerox copy.
This will help me to continue to host this site,
buy new manuals, and pay their shipping costs.
It'll make you feel better, won't it ?
If you use Pay Pal, use the link below.
Use the above address for a check, M.O. or cash.
Back to main camera manual page
Click here for a Gossen LUNASIX3 PDF
version donated to me
Click here for Gossen Lunasix 3 Bedienungsanleitung
Click here for Gossen Lunasix 3s Bedienungsanleitung
Click here for the supplement booklet
Changes to allow higher
voltage batteries
Outside link.
Basic operating instructions Setting the film speed 2 Reflected/incident measurement 3 Light measurement (basic) . 4 Light measurement (specific) 5 Testing the batteries . . . 7 Testing zero position . . . 7 Thinking and measuring Reflected light measurement 8 Measuring area of the LUNASIX 3 9 "Perfect" exposure . . . . 12 |
The personal touch . . . . 13 Motion and depth of field . . 14 Technical appendix . . . 18 Reading the scales . . . . 19 Exposure modification . . . 21 Reciprocity effect 23 The LUNASIX 3 SYSTEM Expanded capabilities . . . 26 Variable Angle "spot meter" attachment 27 Enlarging attachment . . . 28 Microscope attachment . . 29 |
Introduction to the LUNASIX 3
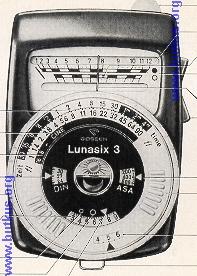
The LUNASIX 3 is the latest in the line of "SIX" Exposure and Colour Temperature Meters - the SIXTUS, SIXTOMAT, SIXON, SIXTRY, SIXTINO, LUNASIX and SIXTICOLOR - made by the world famous manufacturers LUNASIX 3 is the name given to this finest of all Exposure Meters because the LUNASIX 3 can measure reliably any light from the palest moonlight to the brightest sunlight. |
And - even more important - the LUNASIX 3 is
the first SYSTEM EXPOSURE METER. It enables you, by means of instant-lock-on
attachments, to refine your measuring techniques not only in your camera
work on location and in the studio, but in enlarging or in photomicrography
and photography through terrestrial telescopes.
Basic Operating Instructions
Setting the film speed Look up the DIN or ASA Exposure Index of the film in use (you will find it on the film box or film instruction sheet) and turn the plexiglass film-speed setting disc (17) by the raised bars, until the DIN or ASA Index number is lined up against the triangular white marker in the respective window. You will find a detailed DIN-ASA film-speed table in the technical appendix on page 20. |
Reflected Light Measurement:
Move the converter slide (10) all the way to the right; this uncovers
the round window. The LUNASIX 3 is ready when the converter slide has
clicked into position. Point the LUNASIX 3 toward the subject, as
indicated by the arrow in the illustration. |
Incident Light Measurement: Move the converter slide (10) so that the spherical diffuser is centered over the round window. The LUNASIX 3 is ready when the converter slide has clicked into position. The LUNASIX 3 is pointed from the subject towards the camera, as indicated by the arrow in the illustration. |
Light Measurement - (basic steps)
Press the range selector (15) backward and release it when the indicator
needle (14) stops moving. This locks the reading in for convenient
reference.
If the indicator needle is deflected only slightly (below 12 on the scale),
take a new reading by pressing the range selector forward. You have now
switched the LUNASIX 3 to the low light range. Wait again until the needle
stops, and lock the reading in by releasing the selector.
If the light is so poor that you cannot observe the movement of the needle,
simply hold down the selector for several seconds. After releasing it, you
have locked in the correct reading and can take the LUNASIX 3 to better
light, or use a flashlight to read the scale.
As you press the selector forward, the values 1 to 12 appear in the upper
frame, and the upper scale divisions apply, when you press the selector
backward, the values 12 to 22 appear in the lower frame to which the
adjacent lower scale divisions apply. When you release the selector, only
the scale values applicable to the measuring range which you just selected,
remain visible.
Thus, the LUNASIX 3 always shows the correct scale!
After taking the measurement, turn the computer ring (5) until the obtained
reading is set at the triangular yellow index (9) of the transfer scale (6).
The green and red ring indexes apply only for measurements with the Variable
Angle "spot meter" attachment. See page 27.
The LUNASIX 3 now gives you complete
exposure information in combinations off-stops and exposure times (2 and 1),
EV settings (18) or frames per second for motion picture cameras (3).
You will find additional information about all scale values on page 19.
Light Measurement - more specific
In reflected light measurement, the LUNASIX 3 measures the light reflected
by objects within a certain area. The resultant reading, therefore, depends
not only on the intensity of the illumination, but also on the colour and
brightness of the objects themselves. Thus, under identical illumination,
the indicator needle will be deflected less by dark objects than by bright
ones. In an over-all measurement the LUNASIX 3 will read the average
brightness of all subjects in a scene.
If the scene contains strong contrasts in brightness or colour, it is
preferable to measure that part of the scene which requires the most
accurate exposure. For black-and-white or colour negative films, this is
usually a darker area which is to show details in the final print; for
reversal colour (slide or movie) films, however, the lighter areas are
usually favoured.
To measure the important areas, get closer to the subject but not so close
that your own shadow or that of the LUNASIX 3 falls on the subject. This
method is called: close-up reading.
In incident light measurement - from the subject towards the camera - the
LUNASIX 3 measures all the light falling on that part of the subject which
faces the camera. Naturally, neither the colour nor the brightness of the
subject itself is considered by this measurement.
With inaccessible subjects, take the
incident light measurement at a substitute spot which receives the same
illumination as the subject. However, instead of pointing the LUNASIX 3
towards the camera, you point it parallel to an imaginary line from the
object to the camera. Incident light measurement at a substitute spot of equal illumination is also convenient for many regular outdoor scenes. Frequently, the spot where you stand with the camera receives the same illumination as the scene which you intend to photograph, in which case you merely do "about face" with your LUNASIX 3 and measure the light exactly opposite to the direction of the camera. More about this on page 8-11. |
Testing the Batteries
With normal use of the LUNASIX 3, the
Mallory mercury batteries supplied
with it have a life of about two years.
It is advisable to check the condition of the batteries from time to time,
as follows: Push the ridged slide (22) in the direction of the arrow without
pressing the range selector (15). During the battery test, the indicator
needle (14) should point to the red check mark (12). Otherwise, fresh
batteries must be used.
To replace the batteries, unscrew the cover of the battery chamber (21) - a
coin will be useful for this. Make sure you use only Mallory PX 13 batteries
in your LUNASIX 3.
See this link on a Wein Air replacement battery.
After inserting fresh batteries, immediately make the battery test described
above. Mallory PX 13 mercury batteries are available at most camera shops.
Testing Zero Position
To test the zero position of the indicator needle, first remove both
batteries from the LUNASIX 3. Then press the range selector (12) forward or
backward. The indicator needle should now rest on the check line to the left
of the scale divisions (11).
To adjust the indicator needle to the zero check line, turn the zero
adjustment screw (24) on the underside of the LUNASIX 3, while holding down
the range selector (15).
Thinking and Measuring
One thing the LUNASIX 3 can not do: It cannot think for you! Even the most
advanced "electronic brain" is helpless without the scientist who phrases
his problems so that they can be processed by the computer. The LUNASIX 3,
too, answers exposure questions all the more precisely, if you ask more
carefully! You will find this quite easy once you become familiar with your
LUNASIX 3.
Above all, you must know how your LUNASIX 3 sees the world that you want to
get on your film. This world is made up of many parts, which differ
considerably in size, colour and brightness. In the case of reflected light
measurement, the LUNASIX 3 collects, within a certain angle, the light which
is reflected from these many individual parts of the scene; it adds up all
the light and strikes an average for which it indicates a suitable exposure
time. And, normally, the exposure indicated in this manner is perfectly
correct. (Reflected Light Measurement, see also pages 3 and 5.)
Anything unusual which you - as attentive (!) observer - will easily notice,
may not be "seen" by the LUNASIX 3 in quite the same manner. If the scene
includes a large very bright area - far from the "average" that the LUNASIX
3 would normally calculate with - it will indicate a shorter exposure time
than it would for a large very dark area. But you want to see the very
light, or very dark area in the finished picture again as "very light" or
"very dark" - not as "grey"! What to do? Your judgment has to guide the
LUNASIX 3: If there are extensive very bright or very dark areas in the
scene, steer the LUNASIX 3 away from them and take the measurement from the
"average" parts of the scene.
Measuring Area of the LUNASIX 3
You can see in the viewfinder, or on the groundglass of your camera exactly
what will be included in your picture. The LUNASIX 3 cannot orient itself!
Of course, you'll want to know what parts of a scene are included in a
reflected light measurement.
The camera, with your help, selects its "rectangle" or "square"; the LUNASIX
3 Covers a measuring "circle". Whatever lies outside of these variously
shaped areas remains unseen! But you can easily estimate the size of the
LUNASIX 3 measuring area by comparison with the finder or groundglass image.
The illustrations on page 10 show the relation for 35 mm cameras (24 x 36
mm) with various focal length lenses, and for 21/4 x 21/4" cameras, when
reflected light measurements are made from the camera position.
The normal measuring area of the LUNASIX 3 corresponds to a light acceptance
angle of 30".
The normal measuring area of the LUNASIX 3 corresponds to a light acceptance angle of 30°. Still narrower angles (15° or 7.5°) can be measured when the LUNASIX 3 is used with the Variable Angle "spot meter" Attachment. (See page 27.) | The small measuring areas permit very accurate, carefully aimed measurements for exposures with longer lenses, and selective readings of various parts of a scene or subject when normal lenses are used. The lively Indicator Needle of your LUNASIX 3 tells you very clearly whether a scene has uniform distribution of brightness or not. That's especially important for close-up measurements. |
Incident Light Measurement (see also pages 3 and 5)
In this measuring method, your LUNASIX 3 "sees" only the light falling on
that part of the scene which is facing the camera - in other words: the part
which will be photographed. The result of this measurement does not consider
the colour or brightness of the scene itself. Thus, incident light
measurement is ideal for the previous example with extensive very bright or
very dark areas - it will give you perfect results.
Perfect Exposure
The correct exposure for any scene that can be photographed, can be
determined with the LUNASIX 3! But, when is a scene "perfectly" exposed? -
That's not always so easy to
answer! For the amateur, especially the
beginner, the over-all impression is usually decisive. But soon the demands
become more stringent, especially when results are compared. "Perfect
Exposure" normally means: The brightest portions of a colour transparency,
the darkest portions of a black-and-white print, should still show some
detail!
For colour slide or movie film - which as you know, requires more critical
exposure - the lighter portions of a scene usually determine the exposure.
Therefore, keep an eye on such lighter areas and preferably expose a little
shorter rather than longer, to get more brilliant colours.
For black-and-white or colour negative film, however, the shadow portions
which are to have some detail in the finished print must be given
consideration. Therefore, watch the darker areas and expose a little longer
rather than too little.
Most important: Be critical of your results! Analyze your prints and color
transparencies for possible mistakes or errors in judgment. Learn from your
experience: Failures properly analyzed will soon lead to consistent
successes!
Remember, that, when there are extreme contrasts in a scene, the film may
not be able to cope with them! Don't blame your' LUNASIX 3! You will have to
compromise with the limitations of the film by exposing a step more or less
than indicated by the LUNASIX 3. About "exposure steps" see page 21.
However, it is easy to give your LUNASIX 3 your Personal Touch by
harmonizing it with the tolerances of your camera, your favorite film. your
developing methods (or those of your finisher).
Here is how:
The Personal Touch
Do you really have to expose very critically every time? There are two
answers to this question:
(1) On black-and-white or colour negative film you will get good negatives
almost without exception and without fuss.
(2) Reversal colour film is more critical. Deviations from correct exposure
will produce transparencies that are either too light or too dark; you may
also get distortion of colours.
Now, you must remember that the accurate exposure information which your
LUNASIX 3 gives you may not even be fully utilized because all sorts of
"tolerances" must be reckoned with: (a) The actual sensitivity of a film may
differ from the one indicated on the film package.
(b) The actual speeds of your camera may differ from the values engraved on
the shutter. (c) The actual apertures may differ from those engraved on your
camera f-stop scale.
(d) The film development may not always be identical.
(e) In addition, purely subjective considerations and matters of taste enter
into the evalua tion of the finished print or slide. If you make several
exposures of the same scene or subject with various exposure times, you will
almost never get complete agreement among different judges as to which
negative or which slide received "perfect" exposure!
However, you can adapt your LUNASIX 3 exposure readings to
the characteristics of your camera, your favorite film,
your type of processing, your projector - in other words to
your personal touch.
Use a reversal colour film; select
several "normal" scenes; take careful reflected and incident light
measurements and shoot! But - each time make a series of 5 exposures; in
addition to the one at the indicated exposure time, make one each at a full
step and one-half step more and less than indicated by your LUNASIX 3. Make
complete notes of the readings and of any special conditions. When you have
your finished transparencies, select the ones which, in your judgment, are
"perfect" and compare them with your notes concerning exposure measurements,
etc.
If they're O.K. - and in most cases they will be - everything is fine.
Otherwise, determine by how much you need to increase or decrease future
exposure readings to get the best results. With this adjustment you have
then gained your "Personal Touch".
Sharpness for Motion and Depth of Field
After you have taken a light measurement, the computer scales of your
LUNASIX 3 may line up something like this:
time |
1/1000 |
1/500 |
1/250 |
1/125 |
1/60 |
1/30 |
1/15 |
1/8 |
sec. |
f/ |
2 |
2.8 |
4 |
5.6 |
8 |
11 |
16 |
22 |
Unlike conventional exposure meters
whose photoelectric cell consists of a selenium element, the LUNASIX 3
has a photo-conductive cell and is powered by tiny mercury batteries.
While a selenium element converts light into electric energy, the
photo-conductive cell merely changes its conductivity in the presence of
light. The electrical energy which powers the precision mechanism of the
LUNASIX 3 to deflect the indicator needle is here supplied by batteries. |
Diagram of the LUNASIX 3 |
'2 '4 '8 etc. are fractions of
seconds: 1/2 - 1/4 - 1/8 sec. etc. Un-marked numerals 1, 2, 4 etc. are
full seconds. 1m 2m 4m etc. are minutes 1h 2h 4h etc. are hours |
Note: On certain motion picture cameras, the exposure time at normal speed (16 f.p.s.) is not 1/30 second. Check the instructions for your camera! |
ASA Exposure Chart
Degrees |
ASA
Exposure Index |
DIN ExposureIndex |
ASA Degrees |
ASA Exposure Index |
DIN Exposure Index |
70 |
400 |
27 |
|||
|
6 |
9 |
7.5° |
500 |
28 |
1.5° |
8 |
10 |
650 |
29 |
|
10 |
11 |
8° |
800 |
30 |
|
|
12 |
12 |
8.5° |
1000 |
31 |
2.5° |
16 |
13 |
1250 |
32 |
|
20 |
14 |
9° |
1600 |
33 |
|
|
25 |
15 |
9.50 |
2000 |
34 |
3.5° |
32 |
16 |
2500 |
35 |
|
40 |
17 |
10° |
3200 |
36 |
|
|
50 |
18 |
10.5° |
4000 |
37 |
4.5° |
64 |
19 |
5000 |
38 |
|
80 |
20 |
11° |
6400 |
39 |
|
|
100 |
21 |
11.50 |
8000 |
40 |
5.5° |
125 |
22 |
10000 |
41 |
|
160 |
23 |
12° |
12000 |
42 |
|
|
200 |
24 |
16000 |
43 |
|
250 |
25 |
20000 |
44 |
||
6.5° |
320 |
26 |
25000 |
45 |
The ASA scales (4 and 16) show only the
values printed here in bold types; the intermediate values are indicated by
dots on the scales.
Doubling or halving an ASA Exposure Index value is equivalent to one stop.
Increasing or decreasing the ASA Degree by 1 is equivalent to one stop.
Increasing or decreasing the EV number by 1 is equivalent to one stop.
When exposure modification is in order (see
page 12), you simply choose one (and only one!) of the following
adjustments:
If actual LUNASIX 3 reading is, for example: |
One Stop |
|
more exposure |
less exposure |
|
a requires change to: |
||
Indicator Scale 16 EV Scale 10 Shutter Speed 1/30 Lens Aperture f/5.6 |
15 |
17 |
Note: The ASA setting remains unchanged!
Calibration Data
Calibration Data
The table on the back of the LUNASIX 3 shows the approximate calibration
data. These are the footcandle and Lux values (1 ft-c == 10.76 Lux)
corresponding to the LUNASIX 3 scale readings obtained by the incident light
measurement method. The LUNASIX 3 should not be considered a full-fledged
footcandle meter because, strictly speaking, footcandles of illumination can
be measured only be means of a flat interception screen. The LUNASIX 3 is
equipped with a spherical diffusing screen and thus achieves superior
collection of the photographically effective illumination: Photographic
subjects are usually three-dimensional and they are illuminated from many
different directions (sun, sky, reflections from buildings, trees, ground,
etc.). However, the footcandle table can be of practical value for measuring
direct light beams (arc light, spots).
For reflected light measurement, footcandle values cannot be given at all,
since this method measures not the illumination but the brightness of the
surface (field luminance) which can be expressed in footlamberts. The
measured values for reflected light measurement expressed in footlamberts
are approx. 7.5 times smaller than the footcandle values with incident light
measurement. Example:
Indicator scale reading |
Incident light (illumination in (footcandle) |
Reflected light (field luminance in footlamberts |
1 2 3 4 |
.016 .032 .065 .13 |
.0021 .0042 .0084 .017 |
As a result of this calibration, a medium
grey tone will be reproduced by black-and-white as well as colour film with
a density or colour value, respectively that lies approximately in the
middle of the straight line of gradation. Thus, sufficient latitude exists
in correct exposure for those parts of a scene which are lighter or darker
than the "medium grey".
Reciprocity Effect
Film manufacturers base the "speed ratings" of photographic emulsions on
average conditions of exposure times and illumination under which such
emulsions are "normally" intended to be used. However, photography under
poor light conditions may call for "abnormally" long exposure times.
Black-and-white films, generally, tolerate moderate deviations from normal
conditions. On the other hand, reversal colour films - because of their
limited latitude - not only lose "speed" but their colour balance is also
affected.
The reason for this divergence lies in the fact that the effective
sensitivity of every photographic emulsion is at a maximum at some specific
level of illumination. With variations in illumination and exposure time,
the effective sensitivity also varies, a phenomenon which is called the
"reciprocity effect".
Film of various types and makes react differently to extended exposure
times, and it is impractical to incorporate the many possible variations in
the LUNASIX 3 scales. It is advisable to write to the film manufacturer for
information concerning the necessary exposure correction and filtering for
colour correction of the specific film which you are using with extended
exposure times.
Click the link below for the following charts
Kodak |
Ektachrome films (according to Fotostudio 13 Zurich) These values are medium values. According to the emulsion type (High Speed, EX, E 3 etc.) these values may alter slightly. |
Agfacolor With exposure times of more than 15 sec. colour shifts may occur which can be balanced by purple filters 05 or 10 (Agfa Filters). When using colour correcting filters note the filter factor additionally. |
Perutz-Color-C 18
Measured exposure time |
f/stop correction in steps |
from 1/4 sec. and longer from 1 sec. and longer from 4 sec. and longer from 1 min. and longer from 4 min. and longer |
+ 1/2 + 1 + 1 1/2 + 2 + 3 |
The LUNASIX 3 System
Thanks to its unique design as a SYSTEM EXPOSURE METER, your LUNASIX 3
provides you with an adaptability and universality previously unknown in
exposure meters.
Used alone, the LUNASIX 3 continues the superb tradition of the Gossen
LUINASIX as the world's most sensitive, widest range (1 : 2,000,000)
exposure meter. It converts instantly, and without accessories, from
reflected to incident light measurement - and you'll find its one-hand
operation (even with a glove on) a great boon when moments count on
location, or in the studio.
Now, whenever the need arises, you can greatly expand the capabilities of
the LUNASIX 3 by using one of the following exclusive accessory attachments:
LUNASIX 3 Variable Angle "spot meter" Attachment (see page 27) LUNASIX 3
Enlarging Attachment (see page 28) LUNASIX 3 Microscope/Telescope Attachment
(see page 29)
An instant-lock-on device holds each attachment firmly on the LUNASIX 3.
TELE Variable Angle "spot meter" Attachment for the LUNASIX 3 Although the normal 30° acceptance angle of the LUNASIX 3 is ideally suited for all-around use, you may want to measure smaller areas when using long telephoto lenses, or "spot" areas within the field covered by shorter lenses. With the Variable Angle Attachment, the LUNASIX 3 takes readings of 15° and 7.5° measuring angles. The built-in reflex finder with delineated "target" areas lets you pick out the exact portion to be measured. Thus, the LUNASIX 3 System gives you a practical choice of 30°, 15°, 7.5° angles for maximum versatility. |
Enlarging Attachment for the
LUNASIX3 Converts the LUNASIX 3 to an efficient enlarging exposure meter for black-and-white or colour enlargements. It permits you to measure very small areas of the projected image for maximum utilization of paper contrast and colour range. Built-in light conductor (instead of a mirror) for greater accuracy and efficiency. |
MICROscope/Telescope Attachment for LUNASIX 3 A great aid in photomicrography. Fits the ocular tube of all microscopes for exact exposure determination. Also ideal for light measurement of the aerial image in photography through terrestrial telescopes. |
Your Gossen LUNASIX 3
is a valuable precision instrument, made with great care and accurately
calibrated. It deserves your good care! The enormous measuring range - down
to faint moonlight - which you get in your LUNASIX 3, is due to its unique
photo resistor element. Like the highly sensitive nerves of your own eyes,
the photo resistor should not be exposed unnecessarily to bright light for
extended periods. While the element does not change its permanent properties
under long exposure to light, it tends to retain the impression of light for
a while. If the previous impression was "dark", you can be sure of utmost
measuring accuracy. Therefore, always keep your LUNASIX 3 in its case when
you are not actually using it!
The battery and zero position tests described on page 7 enable you to check
the proper functioning of your LUNASIX 3.
Measuring comparisions of your LUNASIX 3 with similar or other types of
exposure meters cannot be made properly without special laboratory equipment
(optical bench).
Do not attempt to open or repair your LUNASIX 3.
GOSSEN SIXTICOLOR Colour Temperature Meter and Filter Indicator Eliminates costly trial exposures and "off-colour" results. At a glance, this compact instrument shows the colour temperature of the light source (2,600 to 20,000 °K) and, simultaneously, indicates the correction filter required for correct colour balance with any type of colour film. The Gossen SIXTICOLOR is an important aid for every user of colour film in still or motion picture photography. Ask your dealer for a demonstration! |
GOSSEN TRI-LUX Footcandle Meter This exceptionally fine instrument measures light intensities from 0 to 12,000 footcandles - with an accuracy of ± 5 0/0! Its microammeter indicates readings in ranges of 0-12, 0-60, 0-600 ft.c. and (with 20X opal multiplier disk supplied) 0-240, 0-1200, 0-12,000 ft.c. The Gossen TRI-LUX is an indispensable accessory for the motion picture and TV studio, lighting engineer, and wherever critical measurement of incident light is required. |