"TIM (the tool man) TAYLOR"
Home Improvements
"Hey honey... lets build something this weekend!"
1991
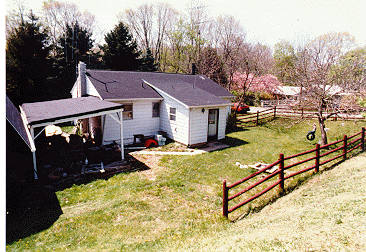
This was our little first (and only) house ($48K). The small addition
on the back center was a laundry room installed by the previous owners
3 years before they sold it.
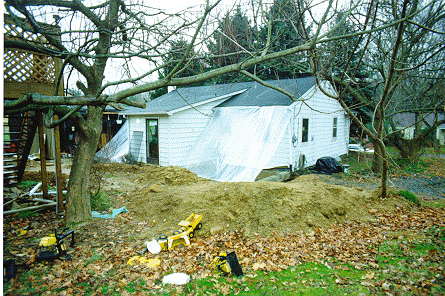
Finally after some 15 years here we decided to expand (the deck was
done a year before) by adding 2 - 12'X15' additions to make the back flush
with the laundry room. We called a few contractors. One came with a price
that matched our budget and would just do just the frame. I would complete
the rest.. It was Sept.
"Oh, sure I can do this honey! Now what tools do I need to buy?"
After waiting a few weeks they dug out the new foundation... another week
(or so) they poured the footing.. a week later they added the foundation........
then we waited. I tried to keep the rain from filling the foundation areas
for a number of days when it rained... we counted the days.... In mid Dec.
we were called and told "8am.. tomorrow..see you then"
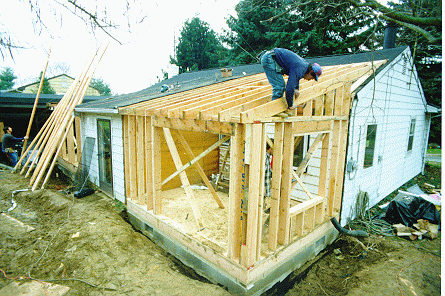
They showed up on time (about 8 of them) and in one day a frame and
sheathing was all cut. Interesting items: I added 10" of batt insulation
to the floor, then Tyvek on the bottom for draft proofing. I changed the
original 2X4 walls to 2x6 for better insulation. It added a hundred or
so to the bill, big deal.
We were suppose to have a regular ceiling, after the frame was made
and we saw the "new" space. The contractor and the two of us decided to
go with a cathedral ceiling. My wife also happen to spot a skylight a few
weeks before the construction, a minor change. The reduction in ceiling
beams in both additions make the move to 2X6 walls a break even point.
(many years later, those 2X6 walls seem to make a big difference in
keeping the house warm.
Notice the nice weather
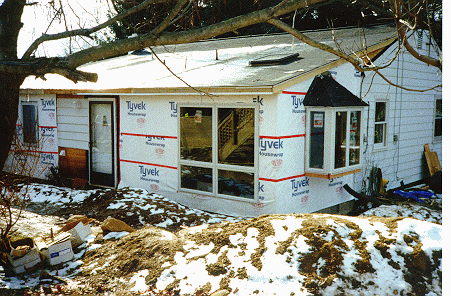
My son and I added the roof the next day, the temp dropped to 20 degrees
and a brisk breeze... thank! We were somehow able to do the two roof areas
in one day. We rented a power stapler, that worked wonders.
A few days later we had the windows in (they are heavy) and I added
the small roof to the wife's "greenhouse" window. It was 10 degrees outside
and I needed 15 min. intervals to unfreeze.
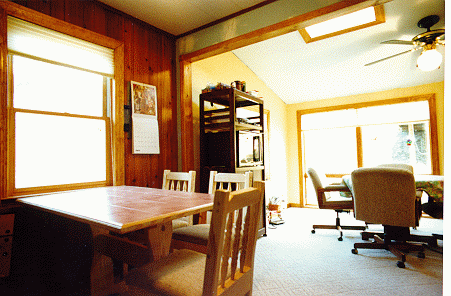
The nice shot of the one addition AFTER many days of adding insulation,
sheet rock, spackle, wood trim, many trips to the Home Depot (gee only
$230 this trip honey) and lots of power tool usage. The new rug is also
down in this shot (yes I also do rugs). She also had to buy a new (ceramic
top) table for the window.
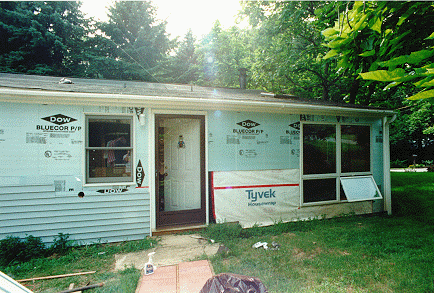
Siding was part of the plan. Purchased at Home
Depot only cost a few hundred dollars total at some $86 per 10'X10'
area.
Update: 2020... the siding is still good ! No problems with the
screws. Actually glad I went with screws.
Update: You can't see
the two crank open windows I added to the addition on the left. Well after
some 15 years, and my son leaving the windows open in the rain, they started to
go bad. So I was able to easily, in the broiling sun, unscrew the siding
and replace the windows with two standard windows. The siding when back
perfect.
One item of interest
I use decking screws to hang the siding. Tried the nails but the thin plywood
sides would vibrate and drive me nuts. The screws went right in, you could
adjust the tightness to make up for some uneven walls and they would slide
on the screws for the needed expansion. Folding foam was added for smoothness
and a bit of extra insulation. This whole event was made even easier by
my NEW POWER SCREWDRIVER. I used a standard 25' ruler and big straightedge
to do the custom cuts. MEASURE TWICE, CUT ONCE.
The old aluminum siding was ripped off and sold as scrap.. got some
$250 in cash at a recycling plant only 30 min. away.


