Home improvement
Hey Honey.. how about a small deck? (1991)
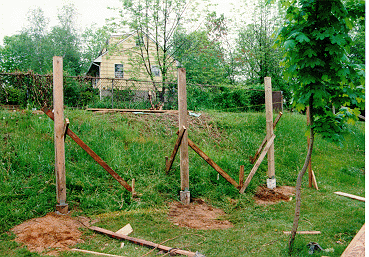 |
Our first major improvement was our prized "hole in the
ground", our pool. The house came with a pool... just that.. a pool, no walk
area, concrete or anything but grass. This nice hill was my chance to test my
"Tim Taylor" ability just before the introduction to the "Home Improvement"
show. So I had no one to show me how to "NOT" do Home Improvements". I used
very basic tools. I am pretty good with my hands so don't try this at home. My
wife was convinced it would take a few "years' to finish this... convinced. I
purchased a used table saw at a garage sale, I had a few tools from previous
small construction jobs. This was my chance to BUY MORE TOOLS! I did read the "Time Life" books and checked a number of other books.. The local lumber store had a deck building workshop with many local zoning tips. |
I also helped another friend for two day build a deck at
their house. I learned a lot and that person helped me start our deck.
Sort
of a Dutch "barn building" payback.
I did the plans on my computer with Lotus Freelance. With all the plans given
the O.K., we started to dig and got the first poles up and beams across.
Yep,
they are 4X6 beams. At 16'X32' I only wanted to do this once!
Remember I did this with simple string, a ruler and my wife being the excellent
assistant. I hoped all the holes matched!
Plus my wife knew it would take 3
years, so I did have time for completion.
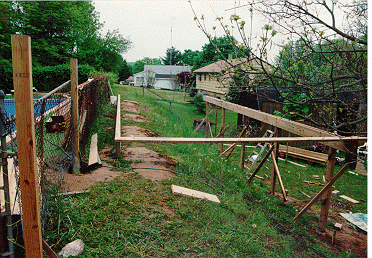 |
Along with the deck, as you see in this picture, the pool
liner was to be replaced. If you're going to borrow, borrow big. A liner was
replacing a professional pool liner installer. MORE
ON THE LINER LATER. All of the lumber was from HOME DEPOT paid for my credit card. Just under my limit too, some $1800 for almost all of it! |
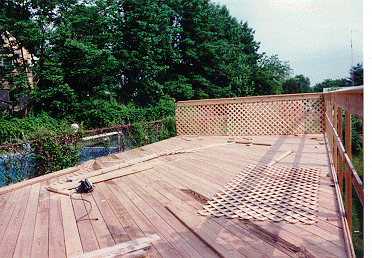 |
TWO YEARS LATER! No, a week later! I had the decking down. A table saw is a must for those 45 degree angles. The rail is 2X6 bolted with pre-grooved bottom lattice holder and I grooved the bottom of the 2X6 rail with a router and lots of "futzing". The top is regular rail top screwed in by coated screws. Many of the things, like the steps were being "thought out" as I worked every night until 8:30 pm on the deck. My small son was a help at time. |
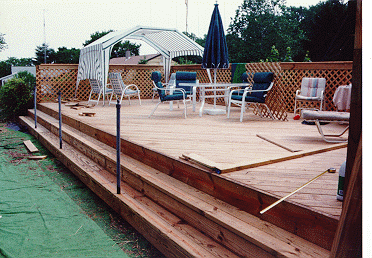 |
As you see I kept the nice fencing pipes. Installed some 5 feet deep with a concrete base by some company in Newark, NJ sometime in the '70s when they did things right! That's why they stayed. I was able to dig out ONE (it's still lieing in the backyard). I decided to place 1"X1" wood around the posts, screw them to each other and make two steps to the deck. After a few false starts I spent another $300 to buy the wood to finish the steps. |
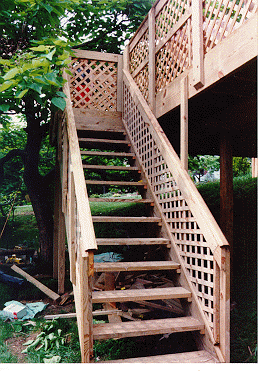 |
Stairway to the stars.. no but ya gotta get up there. Since
I was 3 inches below the 9' height limit I made one straight walkway to the
deck. Same thing with the lattice, just spent time figuring out how to make
the lattice look right at that angle. The required gate is spring loaded and make by overlapping 4/5"X6" decking over lattice with 1/4" bolts holding it together. Real simple and CHEAP. Looks good too! |
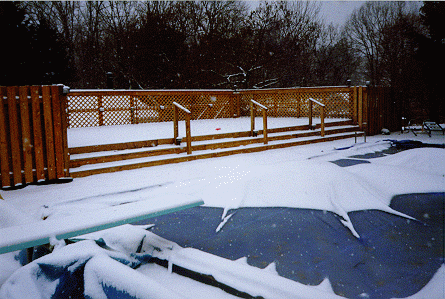 |
Finishing in the winter. FOOLED YOU.. This winter shot is only to show the finished deck. I used a 4X4 to make the top end of the handrail which I bolted to the steps. A short piece of handrail went between the upper and lower parts. We went to the now defunct Channel to purchase (on sale) 1"X6"X6" to make our own fencing. The other old metal fence pipes were covered with wood to make ends for the fence. A 2X6 was used as top and bottoms between the now wood poles with standard L shaped metal brackets supporting the 2X6 |
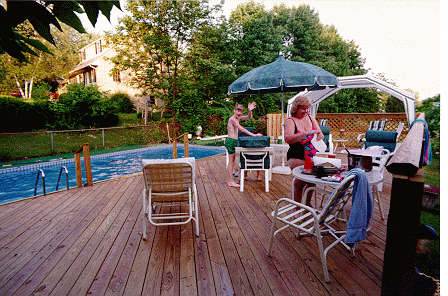 |
The 1X6X6 were screwed to the wood between the poles overlapping on opposite sides. This type of fence went to each end and along the street side of the pool. It took two weekends to construct this type of fence but looks great. This was made with a lot more overlap than factory made fence of this type. This keeps it pretty private. Just a shot to show the deck and new liner. That's when the liner was holding water! |
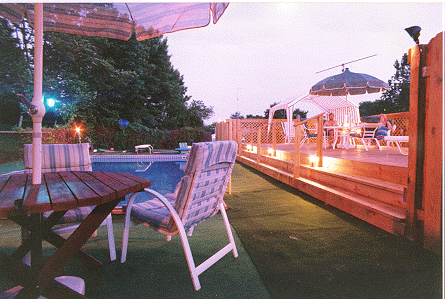 |
AH.. NIGHT TIME DISPLAY!.. deck lighting was added and "grass" rug from Channel placed on top of dirt. If you remember the former pictures there was grass next to the pool. Two days of digging up just the grass with a shovel. Fun in the heat! After a few years I changed the "grass" rug to heavy indoor/outdoor rug. I lasts some 5 years. |
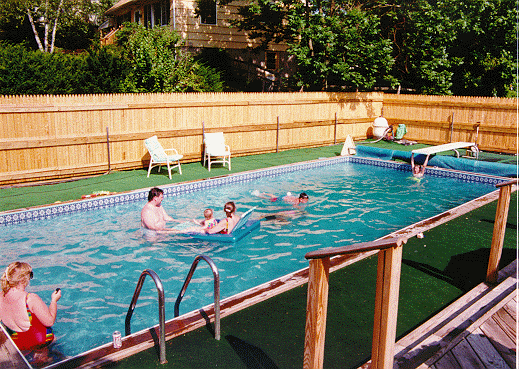
If you look close, you'll see those nice steel fence posts with deep
concrete bases holding up our new fence (on sale at Channel). I purchased the
stockade fence, measured the distance between the factory horizontal rails. I
purchased cheap 2X6 top boards, 2X4 bottom boards and drilled holes through the
metal posts to mount the boards.
The fence hangs on the boards! I added a 2X4 at the top for added support,
drilling through the front of the fence I secured it to the boards. Looks nice
for under 3 grand (deck and fence).
Be prepared for the fence, after a few years, to turn gray. I'm looking to
stain it sometime soon.
New shots with a RUG. Yep after 10 years the deck is starting to splinter and indoor/outdoor rug was cheaper then turning over the boards or replacing the splintering ones.