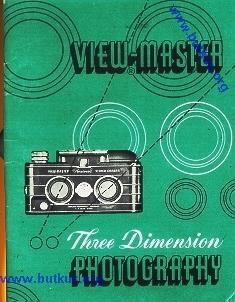
Viewmaster Stereo Camera
posted 2-13-'04
This camera manual library is for reference
and historical
purposes, all rights reserved.
This page is copyright©
by
 ,
M. Butkus, NJ.
,
M. Butkus, NJ.
This page may not be sold or distributed without
the expressed
permission of the producer.
I have no connection with any camera company.
On-line camera manual library
If you find this manual useful,
how about a donation of $3 to:
M. Butkus, 29 Lake Ave.,
High Bridge, NJ 08829-1701
and send your e-mail
address
so I can thank you.
Most other places would charge
you $7.50 for
a electronic copy
or $18.00 for a hard to read Xerox copy.
This will
help me to continue to host this site,
buy new manuals, and pay their shipping
costs.
It'll make you feel better, won't it ?
If you use Pay Pal, use the link below.
Use the above address for a check,
M.O. or cash.
View-Master PDF MANUAL
MADE FROM THIS HTML PAGE
PDF of just the manual
CLICK HERE FOR A WORD DOCUMENT
MADE FROM
THIS PAGE
Webmaster: Due to the way this manual is setup, I can only scan the entire
page.
Welcome to
VIEW-MASTER PHOTOGRAPHY
You have added another
dimension (stereo) and the colors of the rainbow to your everyday picture taking.
You will be one of the first to enjoy your own "Personal". full color, three
dimension pictures.
To insure your enjoyment,
1. We have made this camera
- this whole system of photography-as simple and easy to use as we possibly
could, and,
2. We have written this instruction book to tell you, and show
you with pictures, everything you must know to start taking pictures that will
be truly satisfying and everywhere admired.
SAWYER'S INC.
Home Office Chicago Office
Box 490 3500 No. Kostner Ave.
Portland 7, Ore. Chicago
41, I11.
INSTRUCTIONS
Illustrated
Instructions
Page
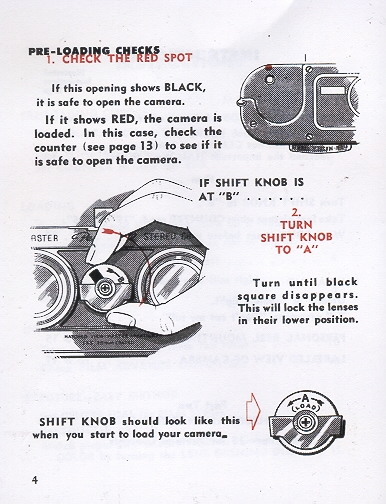
PRE-LOADING CHECKS
Turn SHIFT KNOB
to "A" 4
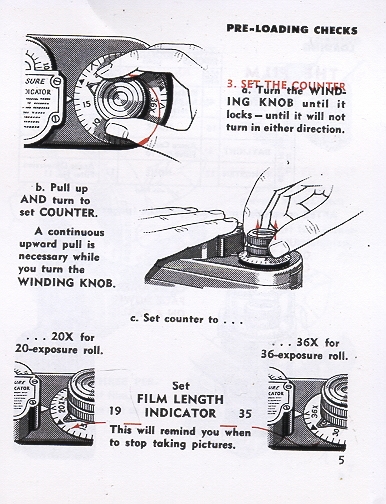
Lock WINDING KNOB by turning.
Set COUNTER
to 20X OR 36X 5
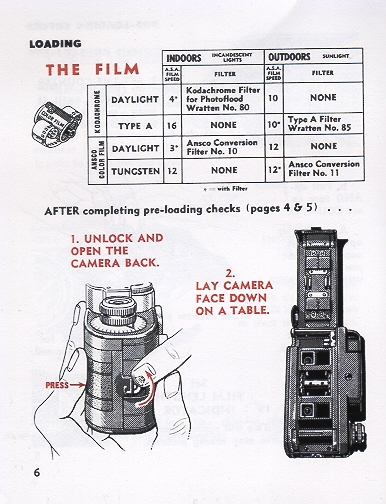
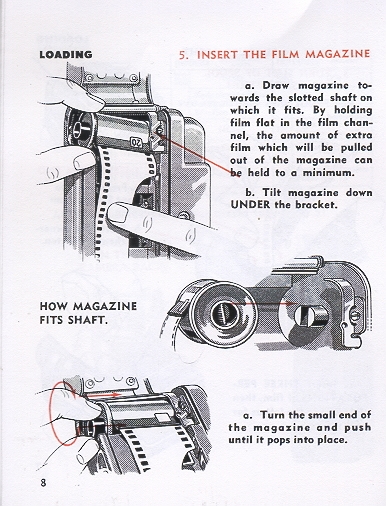
LOADING
Open camera and lay
it face down on a table . . .
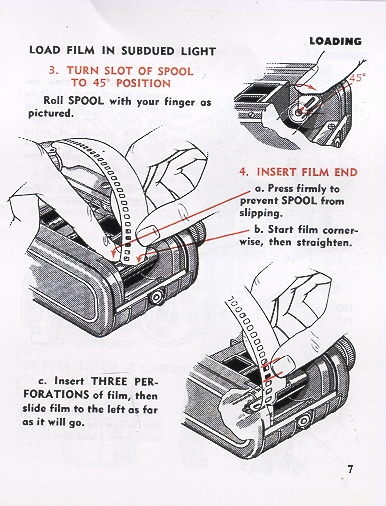
6 Insert three perforations of film in
slot of SPOOL . .
7 Engage magazine on slotted shaft
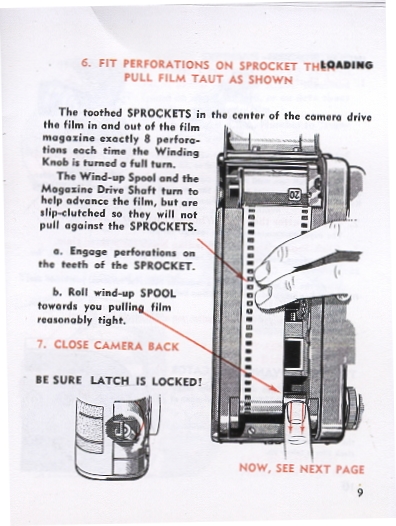
8 Fit film on SPROCKET and pull film tight.
9 Close back of camera
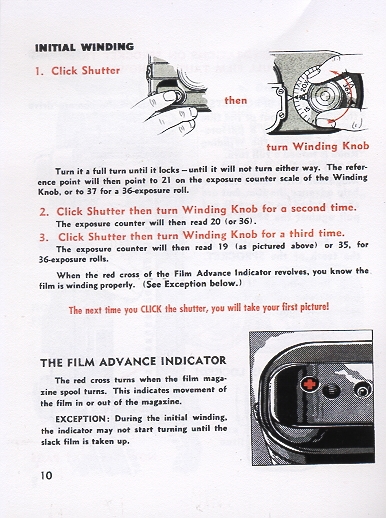
INITIAL WINDING
Turn WINDING KNOB three full turns 10
Check FILM ADVANCE INDICATOR 10
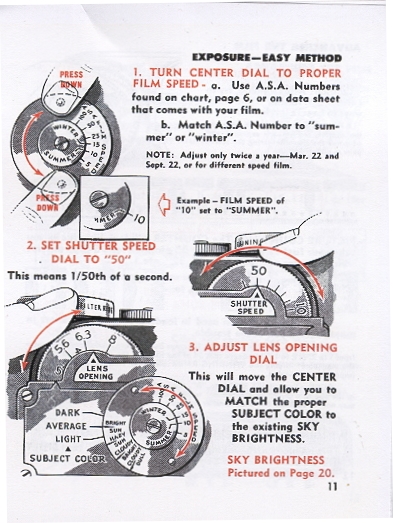
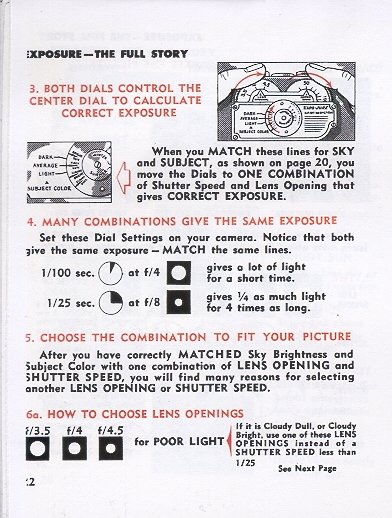
EXPOSURE-EASY METHOD
Set CENTER DIAL for FILM SPEED.
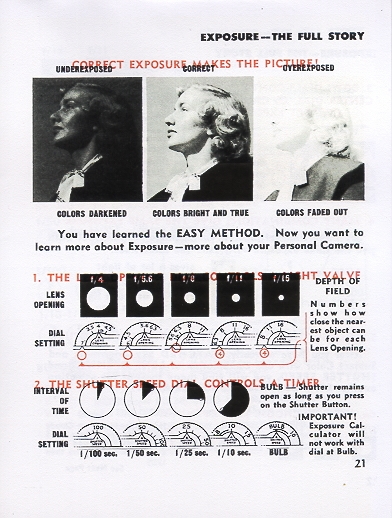
Set SHUTTER
at 1/50.
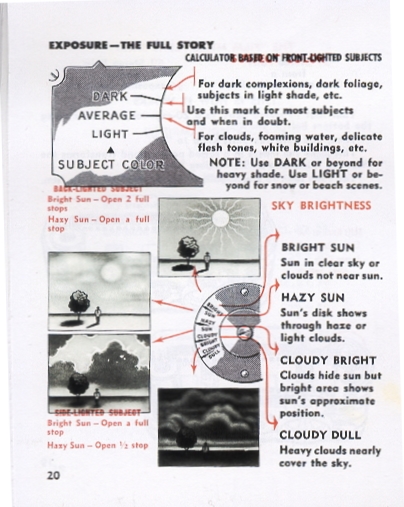
Match proper SKY BRIGHTNESS to correct SUBJECT COLOR by turning
the LENS OPENING DIAL . . 11
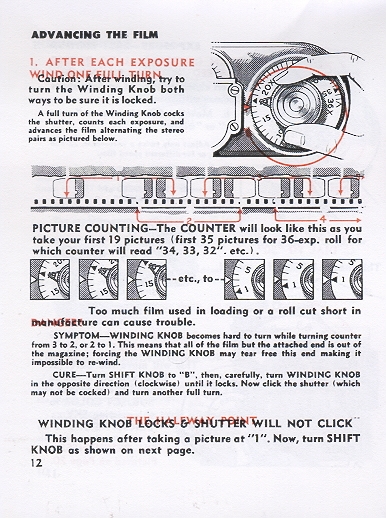
ADVANCING THE FILM
Turn WINDING
KNOB a full turn after each exposure.
When Winding Knob LOCKS and
Shutter will not CLICK, you have
reached the important HALFWAY POINT
. . . . 12
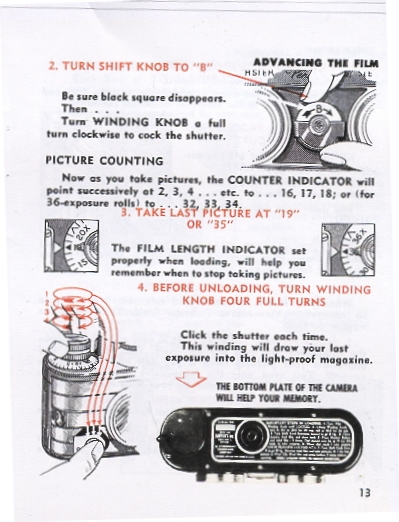
. . . then . . .
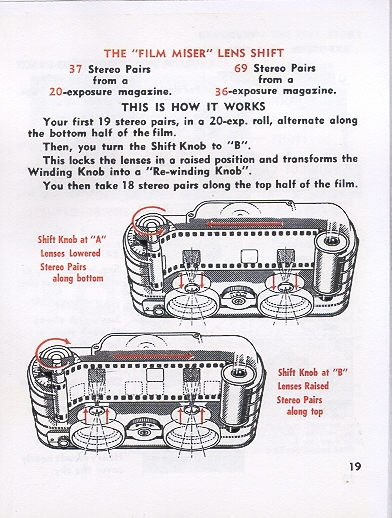
Turn SHIFT KNOB to "B".
Take
last picture when COUNTER reads "19" or "36". Wind FOUR times before unloading 13
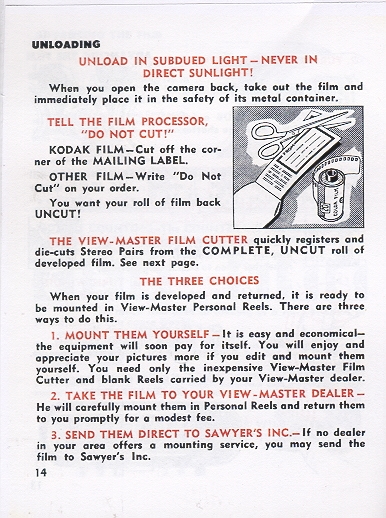
UNLOADING
Unload in subdued light.
Tell processor,
"Don't cut my roll" 14
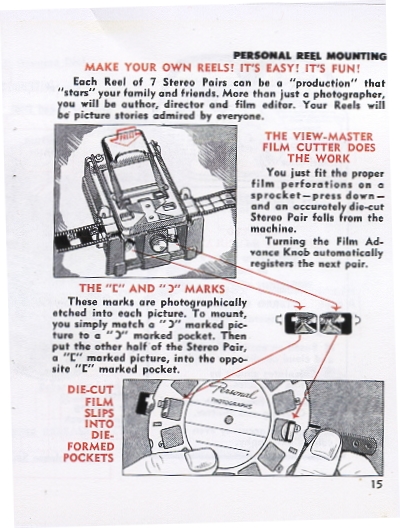
PERSONAL REEL MOUNTING 14 &
15
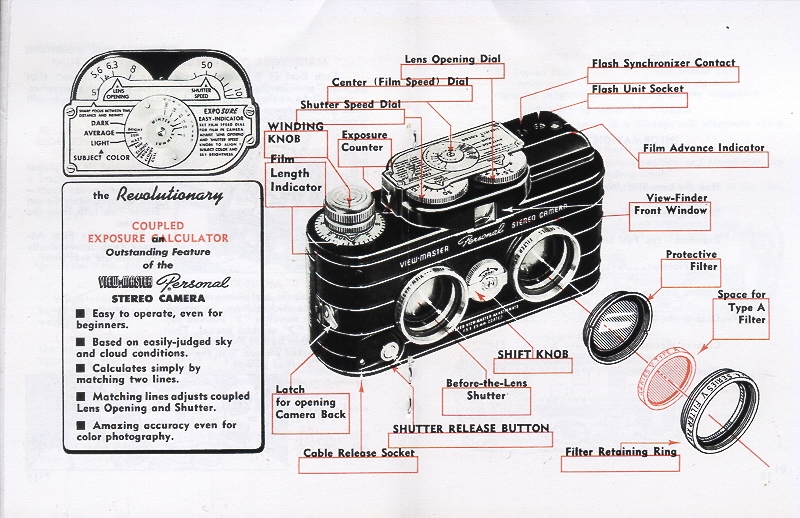
LABELED VIEW OF CAMERA 16 & 17
INFORMATION SECTION
See Page 18 for Table of Contents