|
Back to
FIRST section |
Back to
SECOND section |
Back to
FOURTH section |
Back to
FIFTH section |
WEBMASTER:
![]()
ADVANCED FUNCTIONS
This section describes those advanced features which are used in the
camera modes other than the "*" mode.
| SELECTING THE AF MODE |
This camera has three AF modes. To select the AF mode, set the mode
dial to AF position then turn the S-dial until the desired mode appears
on the LCD panel. The selected AF mode remains visible while the camera
is in use.
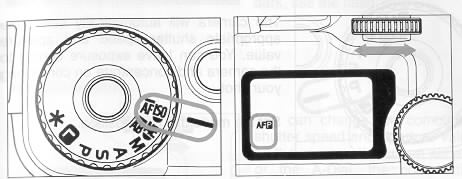
1. AFP The camera will select the AF-S mode and AF-C mode automatically,
depending on the subject situations.
2. AFS The shutter cannot be released until the subject is in focus. When
you press the shutter button "Half-way", the camera focuses on the subject and the focus is locked. If you wish to focus on another
subject before releasing the shutter, remove your finger from the shutter button and press again. This camera automatically set to this
mode.
3. AFC The camera focuses on the subject continuously. You can release
the shutter any time even if the subject is not in focus. If the subject
is in motion the camera will focus continuously and adjust the focus to
maintain focus. However, depending on the subject situation, (i.e. speed
and direction of the moving subject, the lens and shutter speed etc.),
there is a possibility that the picture may be out of focus.
If the lens switch is set on the MF position, the focus mode indication
disappears and the focus should be set manually.
Once you select the AF mode, the camera continuously holds that mode
until you change the AF mode or set the mode dial to the L position.
SELECTING THE EXPOSURE MODE
This camera has four different exposure modes. To select the exposure
mode, turn the mode dial to the desired position. The shutter speed will
operate
1. P PROGRAM AE
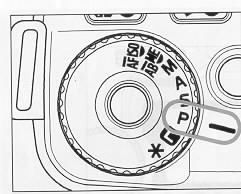 |
The camera will automatically select the appropriate shutter speed and aperture value. You can leave exposure control to the camera and concentrate on composing your shot. Set the mode dial to P position. |
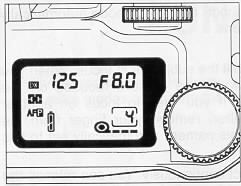 |
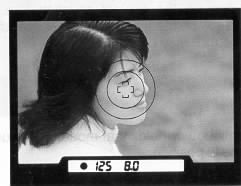
When you press the shutter button "Halfway", the shutter speed and aperture value selected by the camera are displayed In the viewfinder and on the LCD panel. |
 |
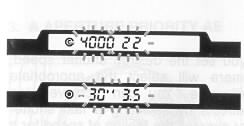 |
If the subject is too bright or too dark, both I shutter speed and aperture value indicators will blink and will show limit values. If the subject is too bright, use an ND filter to reduce the brightness. If the subject is too dark, use the flash. |
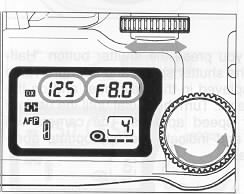 |
You can change the combination of the shutter speed and aperture value selected by the camera. If you turn either the S-Dial or the A-Dial, the combination of the shutter speed and aperture value will change within a range of combinations which give the same exposure. The Program Shift will reset the exposure if the camera has switched itself off or if the mode dial is turned away from the P position. |
For example, when you use the 28-70 mm F2.8 lens and the camera selects
1!125 and F8, you can shift to any of the following combinations, all of
which gives the same exposure.
| Shutter Speed | 1/1000 | 1/500 | 1/250 | 1/125 | 1/60 | 1/30 | 1/15 |
| Aperture value | F2.8 | F4 | F5.6 | F8 | F11 | F16 | F22 |
2. S - SHUTTER SPEED PRIORITY AE
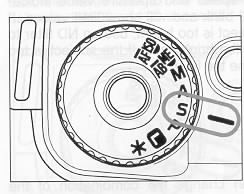 |
When you set the desired shutter speed, the camera will select the appropriate
aperture value. You can achieve stop action effects by selecting a fast
shutter speed or express the feeling of speed for a moving subject by selecting
a slow shutter speed.
Set the mode dial to S position.
|
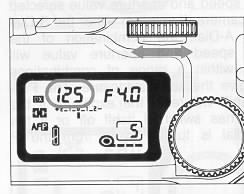 |
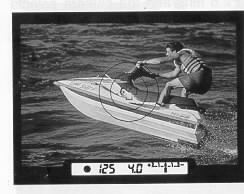
When you press the shutter button "Halfway", the shutter speed and aperture
value are displayed in the viewfinder and on the LCD panel. Turn the S-dial
until the desired shutter speed appears. The camera will select and indicate
the appropriate aperture value.
|
 |
|
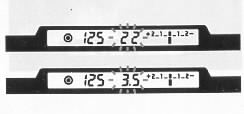 |
If the appropriate aperture value is out of the range of suitable combinations due to the subject being too bright or too dark, the aperture value indicator will blink. If the subject is too bright, set the shutter speed to a faster one, or if the subject is too dark, set the shutter speed to a slower one until the indicator stops blinking. |
3. A - APERTURE PRIORITY AE
 |
When you set the desired aperture value, the camera will select the
appropriate shutter speed. You can make the depth-of field deeper or shallower
by selecting the aperture value.
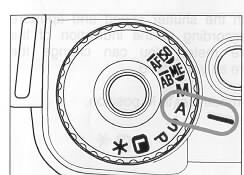
Set the mode dial to A position.
|
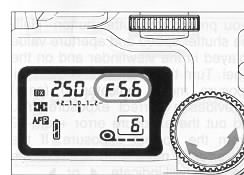 |
When you press the shutter button "Halfway", the shutter speed and aperture value are displayed in the viewfinder and on the LCD panel. Turn the A-dial until the desired aperture value appears. The camera will select and indicate the appropriate shutter speed. |
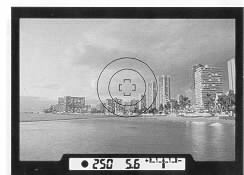 |
If the appropriate shutter speed is out the range of suitable combinations due to the subject being too bright or too dark, the shutter speed indicator will blink. |
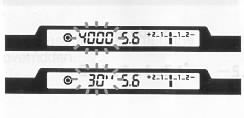 |
If the subject is too bright, set the aperture value to a smaller one (larger number), or if the subject is too dark, set the aperture value to a wider one (smaller number) until the indicator stops blinking. |
4. M - MANUAL OPERATION
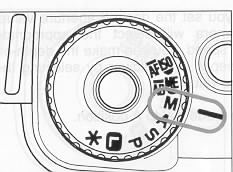 |
Set both the shutter speed and aperture value according to the indication of the exposure meter. You can change the exposure as you intend.
Set the mode dial to M position.
|
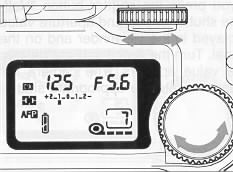 |
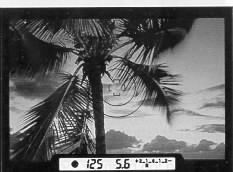
When you press the shutter button "Halfway", the shutter speed and aperture value are displayed in the viewfinder and on the LCD panel. Turn the S-dial and A-dial until the exposure meter indicates 0 (zero) which provides a correct exposure. You can read out the exposure error + or - 2 stops from the correct exposure. If the exposure error is more than 2 stops, the exposure meter will indicate < or > |
 |

5. BULB SETTING
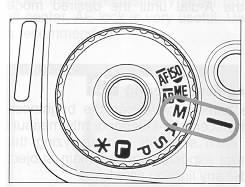 |
When long time exposures are required (for shooting night scenes or very dark subjects) the use of the "Bulb" setting is recommended.
Set the mode dial to M position.
|
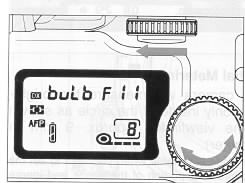 |
When you press the shutter button "Halfway", the shutter speed and aperture
value are displayed in the viewfinder and on the LCD panel. Turn the S-dial
until ''bulb'' appears on the LCD panel. Then turn the A-dial to select
the desired aperture value. As long as you continue to hold the shutter
button down, the camera's shutter will remain open.
|
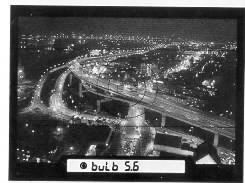 |
A bulb exposure will consume a lot of battery power. When you take a
picture with a long bulb exposure, use a fresh battery. If the battery is
exhausted during the bulb exposure, the shutter will close. When using a
fresh battery, maximum bulb exposure time is about 4 hours. In a cold environment,
the available time will become shorter.
|
If you use the self-timer, the shutter defaults to 1/125 sec. The bulb setting is overridden.
|
Back to
FIRST section |
Back to SECOND section |
Back to
FOURTH section |
Back to FIFTH section |
WEBMASTER: ![]()