BASIC OPERATION
| Back to FIRST section | Back to THIRD section | Back to FOURTH section | Back to FIFTH section |
![]()
The SA-5 camera has many features. This part describes the basic camera operation using Full Automatic Mode "*" and the functions you can use in this mode.
TAKING A PICTURE BY THE * MODE
The "*" mode is full automatic operation mode. The
camera will automatically control the focus, the exposure and the film advance.
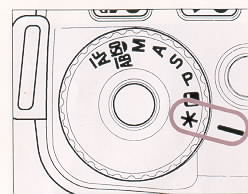 |
1. Set the mode dial to the "*" position while pressing the lock button. |
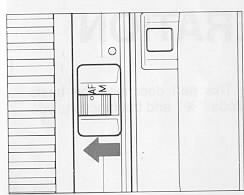 |
2. Set the lens switch to the AF
position.
To avoid damaging the AF mechanism, please do not turn the focus ring manually while in the AF mode. |
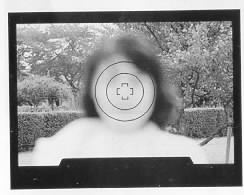 |
3. Align the subject In the AF frame |
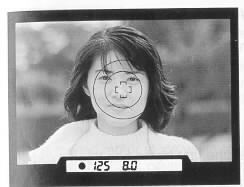 |
4. When you press the shutter button "Half-way",
the camera will focus automatically, and the shutter speed and aperture speed
are displayed in the viewfinder and on the LCD panel.
5. Then you press the shutter button "All-the-Way", the camera releases the shutter and automatically advances the film. |
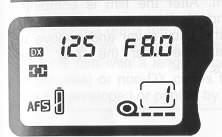 |
6. To conserve battery power, set the mode dial to the "L" position when you are not using the camera. |
 |
7. The flash mark blinks in the viewfinder to warn of a slow shutter. When this occurs use tripod or flash. |
The AF Auxiliary Light will turn on automatically as you focus on a dark area. Effective distance is up to about 4 m.
To conserve the battery, the camera will switch itself off after 6 seconds of not being operated. However, it still is possible for the shutter to be released accidentally. If the mode dial is set on the "L" position, the shutter cannot be fired.
REWIND THE FILM
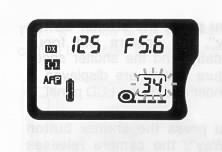 |
1. If you use DX coded film with 12, 20, 1 24 or 36 exposures, the number in the film counter will blink when the remaining frames becomes less than 3. |
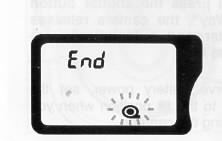 |
2. After the last frame has been exposed, L the camera will automatically rewind the film. After the film is completely rewound, "End" will appear in the LCD. Open the back cover and remove the film cartridge after the "End" mark appears. |
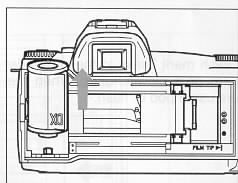 |
|
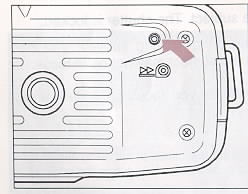 |
3. If you want to rewind the film before the last frame, you can do so by pushing the rewind button located at the bottom of the camera. |
While the film is rewinding, the counter counts backwards.
PRECAUTIONS
If you open the back cover before the film is completely rewound, the light falling on the film will destroy your pictures. Do not open the back cover until the "End" appears on the LCD panel. If you open the back cover accidentally, on rare occasions the camera will become inoperable, LCD panel shows "Err" and the film mark blinks. If this occurs, rewind the film by pressing the rewind button.
If the rewind motor stops while rewinding the film due to low battery power, do not open the back cover. Replace the battery and press the rewind button. You should open the back cover only after "End" appears on the LCD panel.
This camera reads the film's number of exposures from the DX code and will I
rewind the film automatically after the last frame is exposed. However, if you
use the film with a length other than 12, 20, 24 and 36 (such as 10 or 18
exposures) or non-DX codes film, you may take extra frames but they may not be
developed or printed by the laboratory.
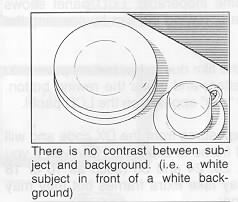
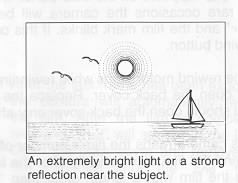
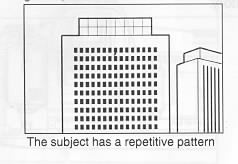
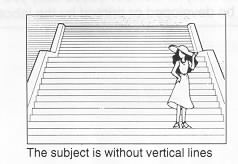
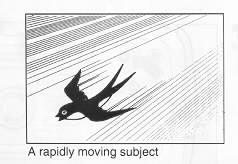
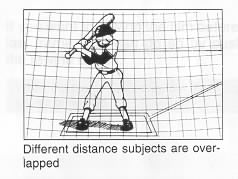
UNSUITABLE SUBJECT FOR AUTOFOCUS
The autofocus mechanism is a high precision instrument and very useful.
However, it is not perfect. Some types of subjects may "fool" the autofocus
mechanism. This can happen if the subject Is similar to the following examples.
In these cased, use "focus lock" (next page) or focus manually.
 |
 |
 |
 |
 |
 |
FOCUS LOCK
Occasionally when the main subject does not fall within the focus frame in
the viewfinder, or the subject is unsuitable for the autofocus system, you can
lock the focus distance temporarily.
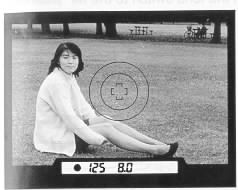 |
1. If the subject isn't in the focus frame when you compose the picture, the camera will focus on the background. |
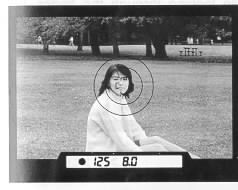 |
2. Move the camera so the focus frame is L around the subject and press the shutter button "Half-way". Be careful not to press "All-the-way". |
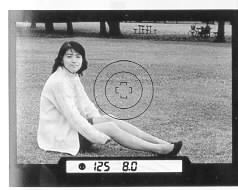 |
3. When the focus indicator lights, the focus is locked. Hold the shutter button "Half-way" while you compose the picture the way you want it. Then press the shutter button the rest of the way to take the picture. If you remove your finger from the shutter button, the focus lock is cleared. You can refocus the focus lock any number of times. |
| FOCUS MANUALLY |
If the subject is unsuitable for use with the autofocus system and hard to
use with the focus lock, you can focus manually.
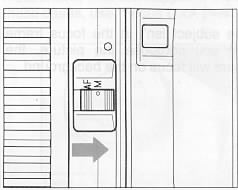 |
1. Set the lens switch to the MF position. (switch is located on lens by lens mount) |
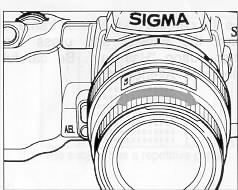 |
2. While looking through the finder, turn the focusing ring on the lens until you get a clear sharp image. |
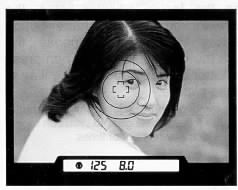 |
3. When you use a lens with its maximum F-number wider (smaller number) than F5.6, press the shutter button "Halfway" while focusing. The focus indicator will light when perfect focus is attained. |
| USING THE BUILT-IN FLASH |
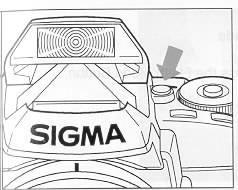 |
1. Press the Flash Pop-up Button. I The
built-in flash will pop-up and |
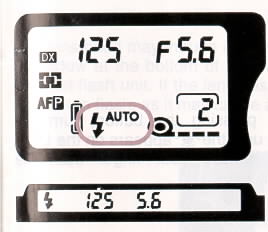 |
2. After the flash is fully charged, the flash indicator in the viewfinder will change from blinking to steadily lit and the shutter speed will automatically be set to 1/125. |
 |
3. Press the shutter button to take a
picture.
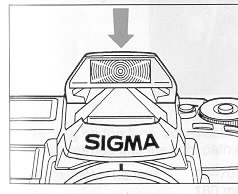
If the flash is not fully charged, (while the flash indicator is blinking) the shutter will not be released. 4. After you finish using the flash, close the flash by
pressing the top part of the flash as shown in the illustration.
|
When you use the flash continuously, the grip of the camera will become warm.
This is normal and not a defect.
| RED EYE REDUCTION |
When you take a flash picture, sometimes the person's eyes reflect the flash light and appear" red-eye" in the picture. Use the red-eye reduction mode when you photograph a person who is looking directly at the camera. The flash will blink several times about one second before the picture is taken.
How to set the red-eye reduction flash mode
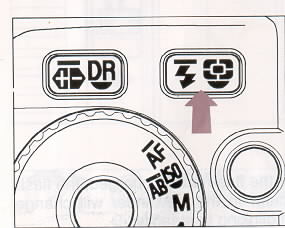 |
1. Press the Flash Mode Button. |
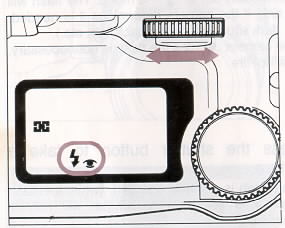 |
2. While pressing the button, turn the L S-dial until
the "eye" appears on the LCD.
Then remove your finger from the button. Once you set the Red-Eye Reduction Mode, the camera continuously holds that
mode until you change the Flash Mode setting.
|
| PRECAUTIONS FOR USING THE BUILT-IN FLASH |
The built-in flash covers a 28 mm angle of view. If you use a lens wider than 28 mm, such as the 24-70 mm zoom lens or the 18 mm ultra-wide-angle lens, the flash will fire but there will be underexposed areas around the edge of picture.
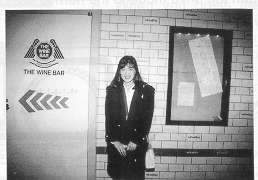
The lens hood may intrude into the light path of the built-in flash unit,
resulting in a shadow at the bottom of the picture. Either remove the lens hood,
or use an external flash unit. If the lens has a built-in lens hood, it should
not be used with the built-in flash, as it may cause a shadow in part of the
picture.
Depending on the lens, zoom setting, and focusing distance, the following lenses may also intrude into the light path of the flash.
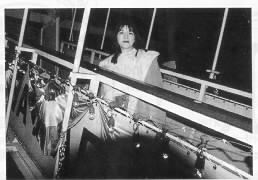
| Large Diameter Lenses: | 28-70 mm F2.8, 70 - 210 mm F2.8, 180 mm F2.8 etc. |
| Long Zoom Lenses: | 70-300 mm F4-5.6, 28-200 mm F3.8 - 5.6 etc. |
| Super Telephoto Lenses: | 300 mm F2.8, 400 mm F5.6 etc. |
| Built-in Lens Hood Lens: | 21-35 mm F3.5 - 4.2, 14 mm F3.5 etc. |
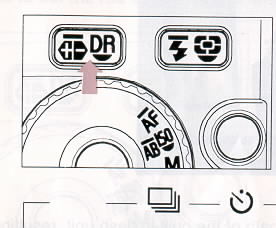
| OPERATION OF THE DRIVE MOTOR |
When you use the "*" mode, you can chose one of three
drive mode. To make your selection press the Drive Mode Button and turn the
A-dial while pressing the button until the desired mode is displayed on the LCD
panel.
Once you select the drive mode, the camera continuously holds that mode.
After taking the picture, return the drive mode to the normal setting.
 |
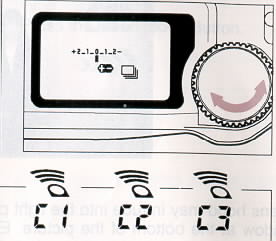 |
1. CONTINUOUS SHOOTING (C1)
While you hold down the shutter button, the camera will take a picture
continuously up to three frames per second. If the focus indicator in the
viewfinder (green light) is on, focus distance and exposure value is fixed at
the settings for the first picture. Note that the picture may be blurry or
incorrectly exposed if the subject moves or the brightness changes from the
first picture.
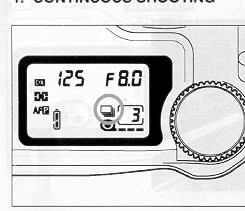
When you use the continuous shooting mode with built-in flash, the camera
will stop the shooting while the flash is recharging. The interval between
pictures becomes much longer.
2. SELF-TIMER (C2)
When you want to include yourself in the picture, put the camera on the
tripod or other camera support and sue the self timer.
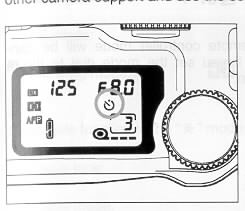 |
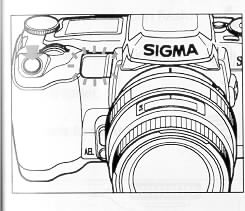
When you press the shutter button, the self-timer ready light
will come on, and you will have 10 seconds to get in front of the camera. The
LCD panel will also count down the remaining time. Three seconds before the
shutter is released, the light will start blinking so every one can be ready for
the picture to be taken.
The self-timer will not start if the focus indicator is blinking or the built-in flash is charging. |
 |
If you wish to cancel the self-timer, press either one of the
mode buttons or turn the mode dial to another position.
The self-timer mode will be cancelled if you set the mode dial to the "L" position. |
The focus distance and exposure value is fixed when the self-timer starts. In case of subject movement or brightness change during the count down of the self-timer, pictures may be out of focus or improperly exposed.
* When you start the self-timer and do not look through the viewfinder, please use the finder cap to prevent light from entering the viewfinder and effecting the exposure system.
3. REMOTE CONTROLLER MODE (C3)
Select this mode when using the optional remote controller RS-11 or RS-21.
This mode has three channels but if you use with RS-11 you should set to "C1".
See
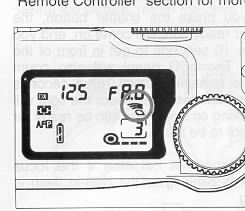
The remote controller mode will be cancelled if you set the mode dial to the "L" position.
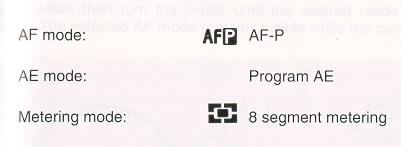
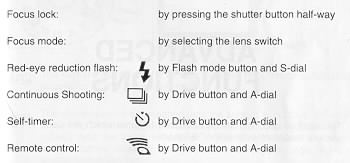
FIXED AND SELECTABLE FUNCTIONS IN THE *
MODE
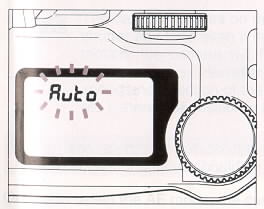
If you accidentally set any function other than above "selectable functions"
while in the "*" mode, " Auto'' will blink on the LCD panel.
WEBMASTER:
Back to FIRST
section
Back to THIRD
section
Back to FOURTH
section
Back to FIFTH
section
![]()