and historical purposes, all rights reserved.
This page is copyright© by
This page may not be sold or distributed without the
expressed permission of the producer.
I have no connection with any camera company.
This camera manual library is for reference
and historical purposes, all rights reserved.
This page is copyright© by ![]() ,
M. Butkus, NJ.
,
M. Butkus, NJ.
This page may not be sold or distributed without the
expressed permission of the producer.
I have no connection with any camera company.
On-line camera manual library.
If you find this manual
useful,
how about a donation of $3 to:
M. Butkus, 29 Lake Ave.,
High Bridge, NJ 08829-1701
and send your
e-mail address
so I can thank you.
Most other places would charge
you $7.50 for a electronic copy
or $18.00 for a hard to read Xerox copy.
buy new manuals,
and pay their shipping costs.
It'll make you feel better, won't
it ?
If you use Pay Pal, use the link below.
Use the above address for a check, M.O. or cash.
Back to main camera manual page
CLICK HERE FOR A PDF VERSION OF THIS
Ricoh PG-4 PAGE
Thanks to Andy Kell for the large JPEG images.
I rescanned in OCR and created this page.
Posted 6-15-'02
|
RICOH COMPANY, LTD. 14 6, 6-chome, Ginza, Chuo-ku, Tokyo, 104, Japan RICOH CORPORATION RICOH EUROPE B.V. RICOH DEUTSCHLAND GmbH |
RICOH
BUSINESS MACHINES LTD. 2808, Wing on Centre, 111 Connaught Road Central, Hong Kong RICOH AUSTRALIA PTY. LTD. (webmaster - As printed in 1980's)
|
 |
|
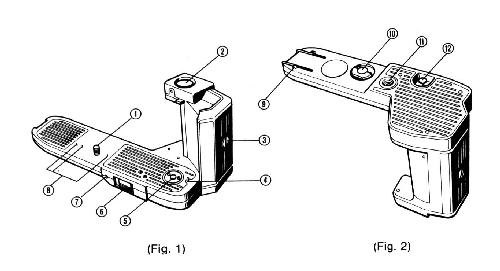
NOMENCLATURE (Fig. 1) (Fig. 2)
(1) Attachment Screw |
 |
Inserting
Batteries
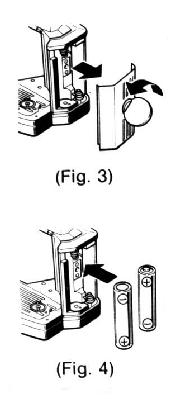
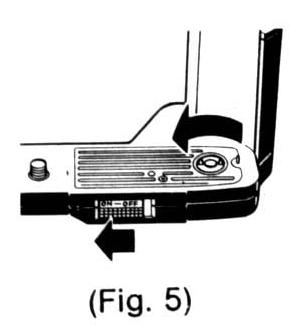
1. Loosen the screw of the battery compartment lid at the side of the power grip and remove the lid. (Fig. 3) 2. Insert two SUM-4 (AM-4 or AAA) batteries into the battery compartment according to the polarity diagram. (Note: When using NiCad batteries, use only those which match SUM(AM-4 or AAA) battery size specifications. (Fig. 4) 3. Close the battery compartment lid and retighten the screw. * When you are not using the power grip for long periods of time, remove the batteries to prevent corrosion, which could damage the unit. * In cold conditions, the voltage of the batteries may decrease so that the described number of shots cannot be taken. Therefore, the batteries should be warmed, and a spare kept warm to used alternately. Checking the Battery 11. Turn the POWER switch ON. 2. Turn the film advance coupler slightly counter clockwise by hand. The coupler will rotate automatically half way. 3. If the coupler does not rotate, check if the batteries are inserted properly. (Fig. 5) 4. If the batteries are correctly inserted but it still does not rotate, replace the batteries with new ones. * Never touch the coupler when it is in action. |
 |
Attaching
the Power Grip on the Camera
1. Make sure the power is switched off before attaching the power grip. 2. Clean the contact points and positioning pins on both the power grip and the camera with a clean, dry cloth. 3. Raise the attachment screw knob of the power grip. 4. Insert the attachment screw into the tripod socket on the camera, and turn the knob clockwise with checking that the positioning pins of the grip fit into the positioning pin sockets of the camera. Tighten the attachment screw knob to lock into position. |
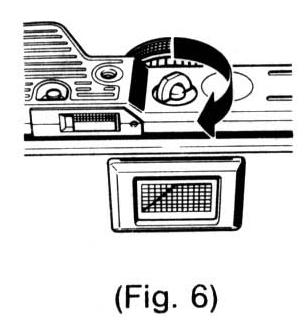 |
(Fig. 6)
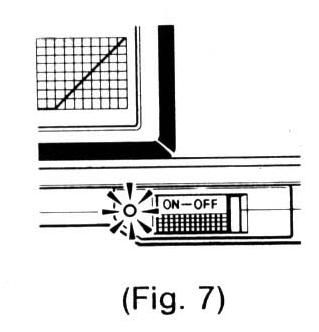
* Make sure that the power switch has been turned off when attaching the power grip to the camera; otherwise the power grip may damage the coupler on the camera. Shooting 1. Turn the power switch ON. 2. Load the film in the camera and choose the photography mode according to your camera instruction. 3. While the shutter release button is depressed, you can shoot continuously at up to 1.4 frames per second. 4. By removing your finger from the shutter release button before the power grip has advanced the film to the next frame, you can take single frame shot. |
 |
5. When all
frames of the film have been exposed, the LED film indicator lights up and
the motor stops automatically. (Fig. 7)
* When using the power grip, the film advance lever should be in locked position, or else it may move. Rewinding the Film 1. Turn the power switch OFF.
|
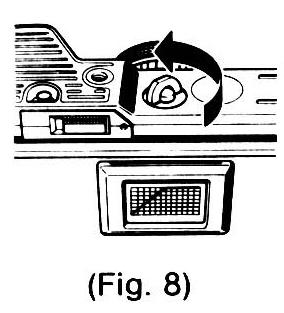 |
2. Push the film rewind
release button. (even though the film rewind release button is back in
original position when you release your finger from it, the film rewind
release button on the camera remains locked in place.) (Fig. 8) |
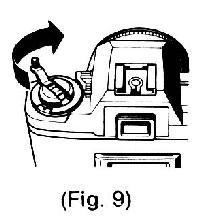 |
4. Remove the film from the camera. After removing the film, turn the power
switch on to get the coupler stationed into the proper position, because
the coupler sometimes stops out of the proper position depend on the
remainder of the film. Then, switch it off again.
|
 |
Using the
Upright Stand
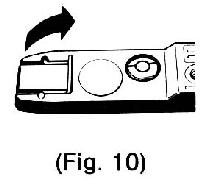
1. When making self-timer photos without a tripod, use the upright stand on the base of the camera as described left. This prevents the camera from falling forward on the tabletop, desktop, etc., even when using the 50mm standard lens. (Fig. 10) 2. When the upright stopper gets in the way during normal photography, return it to its original position. When attaching a tripod into the tripod socket on the power grip unit, be sure to use a tripod screw less than 5.7mm in length.
|
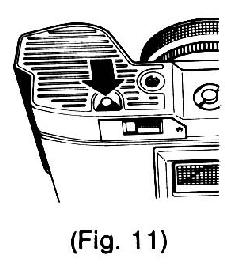 |
Detaching the Power Grip from the Camera 2. Grasp both the camera and grip firmly, and then turn the attachment screw counter clockwise to loosen it and separate the grip from the camera. (Fig. 11) Batteries When using the power grip at temperatures less than 0°C, warm the batteries in your pocket, because battery capacity may fail in temperatures less than 0°C. Due to weakened batteries, the winding speed of the power grip may not be emitted as fast as the display. This is not a malfunction, the performance of the power grip will be affected by the amount of battery power. |
Specifications Ricoh Power Grip PG
Usable Camera: Ricoh XR-P, XR-20SP / KR-30SP
Type: Grip-type winder unit with built-in shut release button
Batteries: 2 - AAA size batteries (Also NiCad batteries which meet AAA size specifications or AM-4)
Film advance speed: max. 1.4 f.p.s.
No. Frames film advance: Approx. 20 rolls of 24-exposure film w/AM-4 (AAA) batteries
Exposure counter: Uses camera exposure counter.
Shutter release button: Release on grip top also release camera.
Shutter synchronization speeds: All camera shutter speeds, including Power switch:
Sliding-type switch: power shuts completely with switch set to off.
Film End Indicator: LED indicator lights at end of film (motor shuts off approx. 1 sec. after LED lights)
Method of attachment: To camera tripod socket via screw.
Film wind/power on confirmation: Coupler rotates automatically after rotating slightly with finger.
Film rewind: Manual with camera rewind knob.
Upright stand: Swing out type
Tripod socket: At base of grip unit.
Dimensions: 1 46(W) x 72.2(H) x 58.7(D)mm
Weight: 155 g (without batteries)