Write to me.
Whitfield Pellet Stove
Low Limit switch replacement (1-3-'04)
I have a test/repair manual for this stove.
Write to me.
![]()
Tools needed 1/4 socket and wrench
Oil for the fans
replacement low limit switch
NUMBER ONE: UNPLUG THE STOVE - 120 volts can kill
First you need to remove the back panel. This requires a 1/4 socket set. You only need to to loosen the screws, raise the back with your fingers using the two center holes, then off.
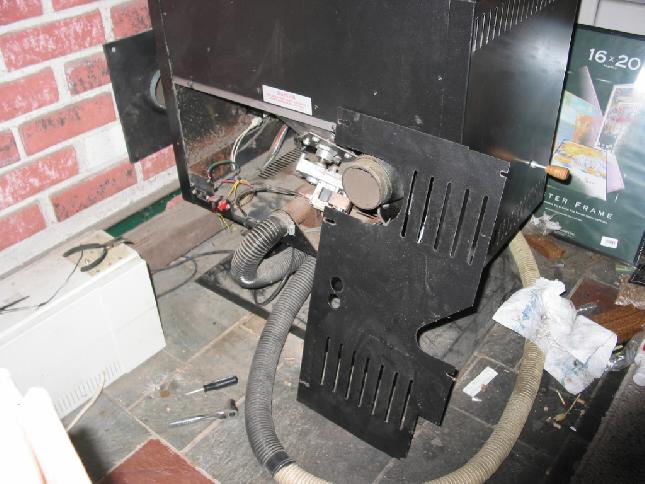
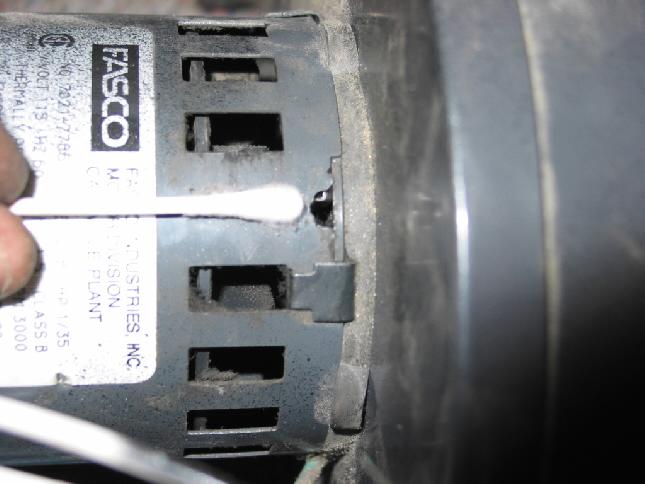
While you have the back open you can oil the fan and exhaust fan. I used synthetic motor oil, put a bit in the cap and use a tooth pick or cotton swab stick (with the cotton removed) to dip in the oil and let it drip off the end and into the oil holes. Below are the locations to the oil holes. They are located at the top of the motors. My exhaust had two rubber caps protecting the old holes. A fine needle nose pliers were needed to remove them. I used a tooth pick, inserted in the holes, to push them back. I did add some 6-8 drops per hole. Last time I oiled was 4 years ago.
|
|
|
|
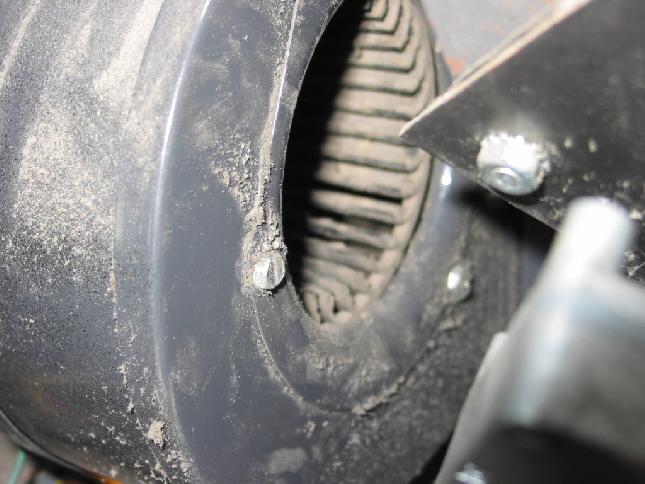
This is the fan blower that pushes |
This is the exhaust fan |
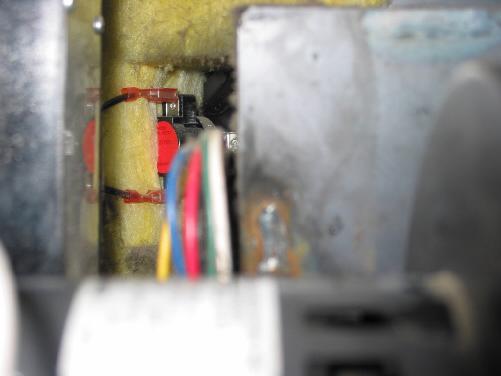
The "LOW LIMIT SWITCH" is the white ceramic disk by the exhaust fan. It is timed by the computer that if after 30 minutes, the stove exhaust fan will simply turn off and the stove will shut down if that switch does not feel the exhaust is above 120 degrees. There can still be fuel burning in the pot and will smoke up the house.
|
|
|
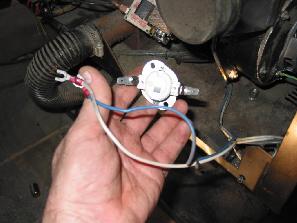
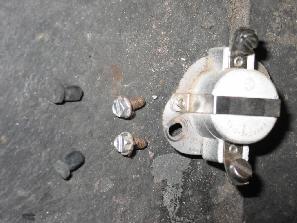
Above, new low limit switch ($35 + shipping) from www.hearthtools.com with push on terminals that can be removed, right, is the original screw on switch, the two 1/4 screws that have to be removed as needed in my stove. Also shown are the two rubber seals for the oil spots on the exhaust motor. Very little room for a screwdriver and sharp edge on stove cut me (dah! ... I touch a tool and bleed) This shows how you can bypass this switch if you really need the heat. This is just bypassing the safety switch. This will test if the switch is defective.
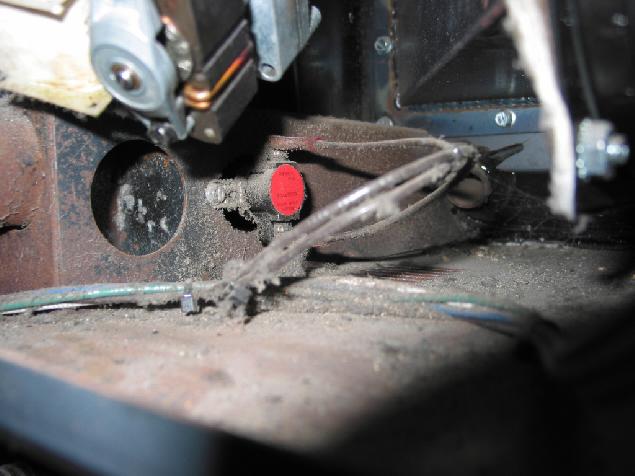
In the shot above you can see the vacuum switch which will shut off the stove if the exhaust becomes clogged or almost blocked by soot, bird nest, nesting material.
- - - DOUBLE CHECK THAT THE STOVE IS UN-PLUGGED - - -
In order to replace the "low limit switch", you need to remove the two screws shown on the above right photo. I would replace the contact wires before you put back the low limit switch. Getting those sheet metal screws back in were a bit difficult. The screws stripped after going in. No problem as they only needs to be snug.
Here is a shot of the other blower, the room blower. Behind that is a RED high temp switch. Not sure how you would get to that. This is connected to the motor feed. Without that providing current, the feed will not work.
If you need to remove the blower motor (oil it each year or so) there are 4 screws (7/16") and a power plug that needs to be pressed together to release the connection. It may be easier to remove the assembly to clean and oil, maybe not. A 1/4" socket with 2 long extensions did the trick for me. When cleaning/oiling, you should clean the blower fan blades. A Q-tip run between the blades to get the dust will do it. Get all the blades, don't want it out of balance.
External air intake for a pellet stove
Guess what. In my stove the external air input pipe runs it to a hole in the back of the stove. The outside air then just enters the back of the stove. If your stove is off . . . . you get cold air in your house. I guess if you duck tape the back stove vents would force the stove to use only outside air and keep outside air from making your house cold when the stove is off. I assumed that the outside air tube lead directly to the fuel pot.
How does the "low limit" switch work?
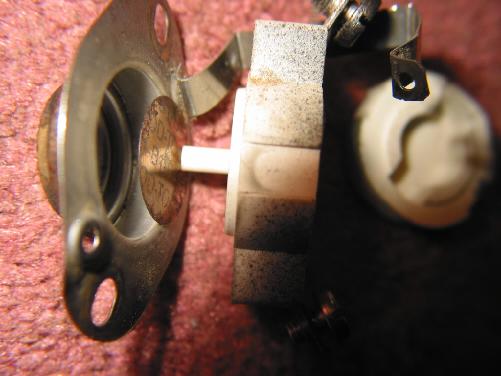
In the metal front, a snap pushes forward and back (printed side goes toward switch - note the small circle in center). A ceramic rod pushed by that metal front, opens and closes those two metal contacts. When cool, the switch is "open" and the snap is bumped towards the switch keeping them "open". When heated (130 degrees) you will see it click almost flat, allowing the ceramic rod to be pushed down by the top electrical contact, allow electricity to pass. This tells the computer you "have a fire" and continues to run the exhaust. Maybe my contacts were dirty and a little sandpaper could fix it. Maybe the metal snap, gives out after years of heat. Guess if you wanted to try, it comes apart pretty easy. Watch your hand with the screwdriver while prying it apart. The replacement part came in a week so I just replaced mine. Bypassing this switch took 20 min. but then the stove would never turn off with-out unplugging it. Without this switch if the fire burned out, it would keep the stove and feeder running, filling up the stove with un-burnt pellets.
This shot shows the removable snap, the ceramic rod that pushes up and separates the contacts. It seems the contacts just needed cleaning with some 300 girt sandpaper (emery paper). You can check by just watching the contacts open and close when applying heat to the switch without the top on and pressing down the unit. Don't know how you'll seal it again as the rivet is damaged by taking it apart. That area needs to be smooth to seal around the exhaust fan. I would guess that smoke/soot could exit by that area an enter your room if a round screw replaced the rivet. Some hardware stores sell rivets.
AGAIN THIS INFORMATION IS FOR REFERENCE... I HAVE DONE BUILDING ADDITIONS AND ELECTRICAL WIRING LATER APPROVED BY A BUILDING INSPECTOR.
